Introduction
Universal Links provide an elegant way to connect your website and iOS app. They ensure users get directed to in-app content when your app is installed, or to your website when it’s not — no extra redirects or prompts. Introduced in iOS 9, this method is preferred over traditional URL schemes due to its security, simplicity, and better user experience.
When a Universal Link is tapped:
- If your app is installed, it opens directly to the relevant screen.
- If not, the link opens in Safari like a regular webpage.
Example Use Case
Let’s say you run a travel app. You want to share a link that opens a page showing available flights to Paris. With Universal Links:
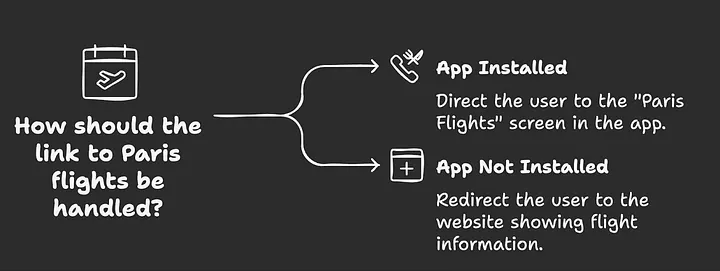
- If the app is installed, the user lands on the “Paris Flights” screen.
- If not, they’re shown the same info on your website.
Setup Guide
Step 1: Create the Apple App Site Association (AASA) File
AASA file is like a helper for iOS apps. It links your website and app, making links work well. Think of it as a guide telling your app where to go when someone clicks a link on your site. Making and setting up this file is important for smooth teamwork between your iOS app and website.
Here’s what a basic file looks like:
{
  "applinks": {
    "apps": [],
    "details": [
      {
        "appID": "TeamID.BundleID",
        "paths": ["*"]
      }
    ]
  }
}
appID is a combined string value of TeamID and your app’s bundle identifier.
So, an app with team ID XYZ and bundle identifier com.example.apple will have appID in the file as:
XYZ.com.example.apple
You should adjust the TeamID and BundleID sections according to your project.
["*"]in the path section means it triggers all paths.- Using
["/students/*"]will trigger all paths under thestudentspath.
Some Rules that must be followed for the AASA file:
- The name of the file should be
apple-app-site-association - Place the file at the site’s
.well-knowndirectory - The file should be a valid JSON file without any extension and should be served from an HTTPS address
(you do not need to append
.json) - The uncompressed file size should be no greater than 128 KB
- The file should have a MIME type of
application/json
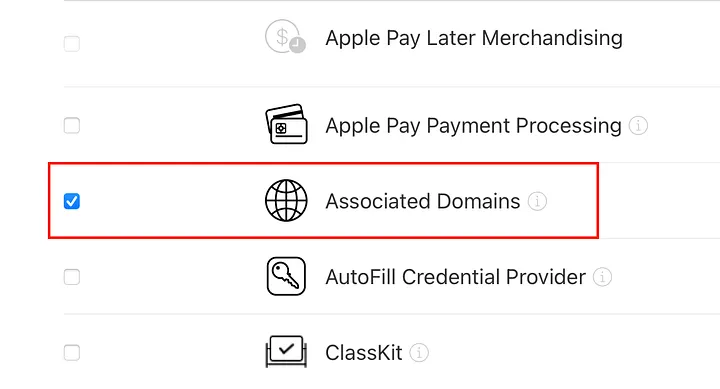
Step 2: Enable Associated Domains in Apple Developer Portal
Go to the Apple Developer Account
Select Identifiers ➝ Choose your App ID
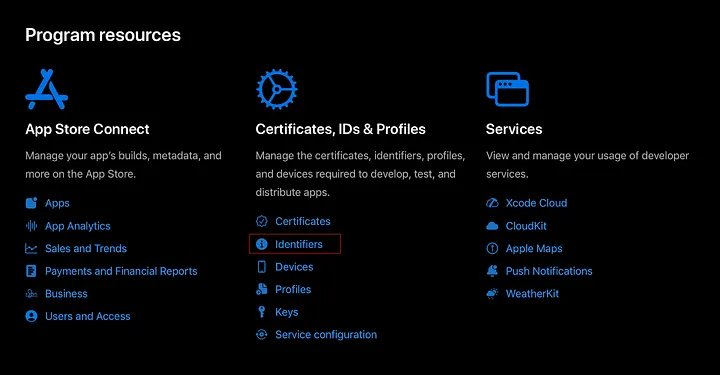
Then select the Identifier for which we want to add a Universal Link and enable Associated Domains.
After all, go to the Profiles section, create a new profile, and import it to Xcode. This way, our processes on the Apple Developer side will be completed.
Step 3: Configure Associated Domains in Xcode
Open Xcode, select your project Go to Signing & Capabilities
Click the + button ➝ Add Associated Domains
Add your domain(s) using the applinks: prefix:
applinks:yourdomain.com
applinks:www.yourdomain.com
You can add multiple entries for different subdomains if needed.

Step 4: Handle the Link in AppDelegate
When the app is opened via a Universal Link, iOS will pass it to the following method:
func application(_ application: UIApplication,
    continue userActivity: NSUserActivity,
    restorationHandler: @escaping ([UIUserActivityRestoring]?) -> Void) -> Bool {

    guard userActivity.activityType == NSUserActivityTypeBrowsingWeb,
          let incomingURL = userActivity.webpageURL,
          let components = URLComponents(url: incomingURL,
                            resolvingAgainstBaseURL: true),
          let path = components.path else {
        return false
    }

    print("Universal Link Path: \(path)")
    // Add logic here to route to the correct screen
    return true
}
In SwiftUI, if you’re using UIApplicationDelegateAdaptor, this function still works. You need to delegate correctly.
Testing Tips
- Open the link on a real device (Universal Links don’t work in simulators)
- Ensure your site is properly serving the AASA file
- Use
NSUserActivityto test inside the app - Use Notes, Messages, or Safari to test the link redirection
- Check your domain with:
https://yourdomain.com/.well-known/apple-app-site-association
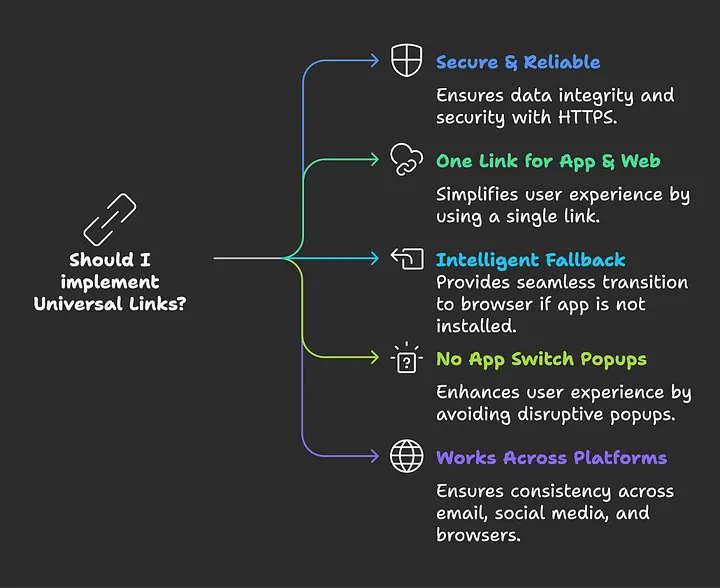
Benefits of Universal Links
- Secure & Reliable (HTTPS only)
- One link for both the app and the web
- Intelligent fallback to the browser
- No app switch popups like with URL schemes
- Works across email, social media, and browsers
Conclusion
Universal Links provide a modern, seamless way to handle deep linking in your iOS app. By setting up your AASA file, configuring your app, and enabling the right capabilities, you ensure that users get the best experience, regardless of whether your app is installed. Universal Links are essential for building a great mobile UX that bridges the gap between the web and app worlds.
For Reference
- Apple Docs: Supporting Universal Links
- Apple Docs: Associated Domains
If you found this useful or learned something along the way, give it a like 👏
Related Topics
Enjoyed this article?
Check out more blogs on our blog.